Bud washing: What is it and why should you do it?
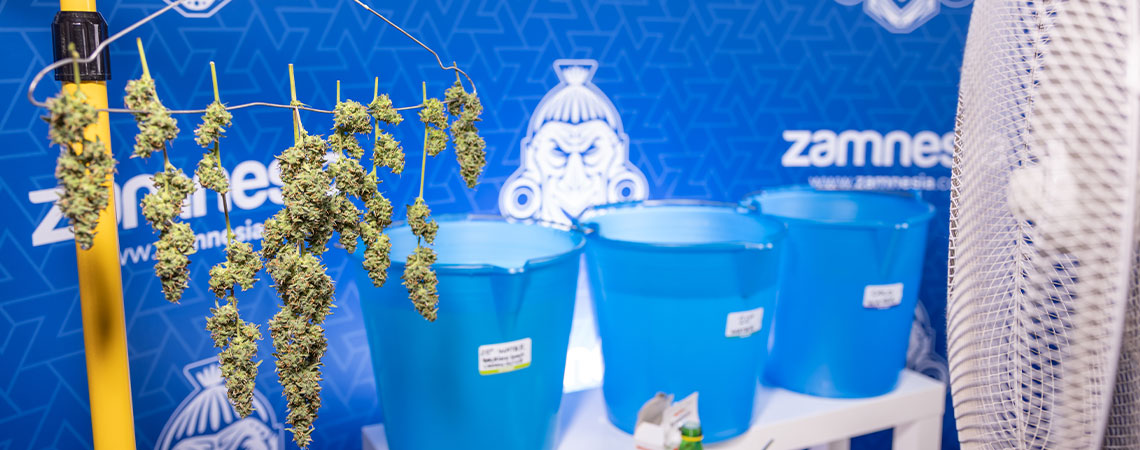
It may sound like a crazy idea, washing your buds after you've spent so long growing them. Many worry about their harvest losing potency and flavour after giving it a wash. However, that couldn't be further from the truth. Read on to find out the real deal about bud washing. Just make sure you leave your soapy water and sponge behind!
When you think about harvesting cannabis, trimming and drying usually come to mind, but bud washing rarely gets a mention. However, this simple post-harvest technique is gaining attention among home growers, and for good reason. Bud washing involves gently rinsing your freshly harvested cannabis flowers to remove dust, dirt, insects, and even residual pesticides. While it might sound counterintuitive to drench your buds after all that careful cultivation, washing can actually lead to a cleaner, smoother, and more enjoyable final product.
Whether you're battling outdoor pollutants or indoor pests, here you will learn how to properly wash your buds and elevate the quality and safety of your harvest.
What is bud washing?
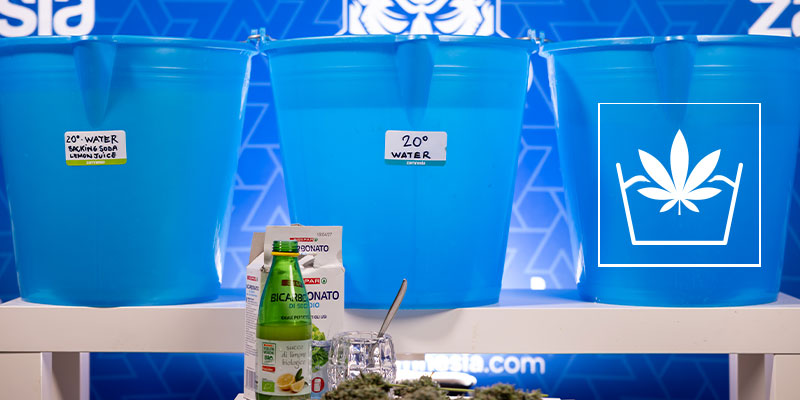
As we've alluded to, bud washing is the method of rinsing freshly harvested cannabis flowers in a series of water-based solutions to remove any physical contaminants. Although it's not yet a universal practice, more and more growers, especially those cultivating outdoors or in less controlled environments, are adopting it to improve the cleanliness and overall quality of their buds.
This technique originated as a practical response to environmental challenges that impact cannabis during the flowering stage. As you might expect, outdoor plants are particularly vulnerable to airborne debris such as dust, pollen, and ash, while both indoor and outdoor crops can accumulate insects, mould spores, and pesticide residues. Even indoor gardens aren't immune, as grow room fans, humidity fluctuations, and nearby activity can all introduce unwanted particles to your plants.
For the best results, make sure your washing process is integrated into a well-timed harvest and post-harvest routine.
Does bud washing affect weed quality?
One of the biggest concerns growers have about bud washing is whether it will cause damage to their harvest. While exposing your buds to water may sound risky, when done correctly, the process doesn't harm the trichomes or affect potency. In fact, washing your buds can help reduce the harshness and respiratory irritation that might result from smoking or vaping contaminated flower.
Trichomes, the resinous glands that contain cannabinoids and terpenes, are surprisingly resilient. These delicate structures remain intact when buds are gently swirled in properly prepared wash solutions. Plus, cannabinoids and terpenes are hydrophobic, meaning they're very capable of remaining inside the trichomes, even when submerged.
However, poor technique, such as using overly hot water, harsh chemicals, or failing to dry buds properly, can cause mould or degrade quality. That's why it's essential to follow best practices and use the right ratios and drying conditions (we'll get into those shortly!)
Ultimately, washing your buds helps preserve, not compromise, their integrity, especially when paired with a sound harvesting plan. For more insight on maximising your harvest's potential, check out our dedicated article on when to harvest cannabis plants.
Why should you wash your buds?
While there are a few risks associated with careless handling, the pros of bud washing generally outweigh the cons.
Benefits of bud washing
- Cleaner smoke: Rinsing off dust, dirt, insect debris, and foliar spray residue leads to a smoother, less harsh smoking or vaping experience.
- Removal of contaminants: Outdoor and indoor plants can harbour pests, mould spores, pollen, and lingering pesticides. Bud washing helps eliminate these threats before curing.
- Improved drying and curing: Clean buds tend to dry more evenly and efficiently, reducing the risk of uneven curing or unpleasant flavours.
- Visual appeal: Once fully dried, washed buds often look brighter and fresher, making them more attractive for personal use or sharing.
Potential drawbacks
- Risk of mould if not dried properly: Introducing moisture to dense buds can create an environment for mould growth if they're not dried thoroughly and quickly.
- Extra time and equipment: Washing adds another step to your post-harvest workflow and requires clean buckets, water, and ingredients like baking soda, lemon juice, or hydrogen peroxide (depending on the method).
- Learning curve: New growers may be hesitant or unsure about the technique, but with practice and proper guidance, it can become second nature.
Simply put, bud washing is an optional yet highly effective way to boost the safety, taste, and overall quality of your cannabis, especially when grown in less-than-ideal conditions.
How to bud wash
We've explained how quick and easy it is to do, so let's get down to business! Here's a detailed bud washing recipe to help you clean your cannabis buds successfully.
What you need
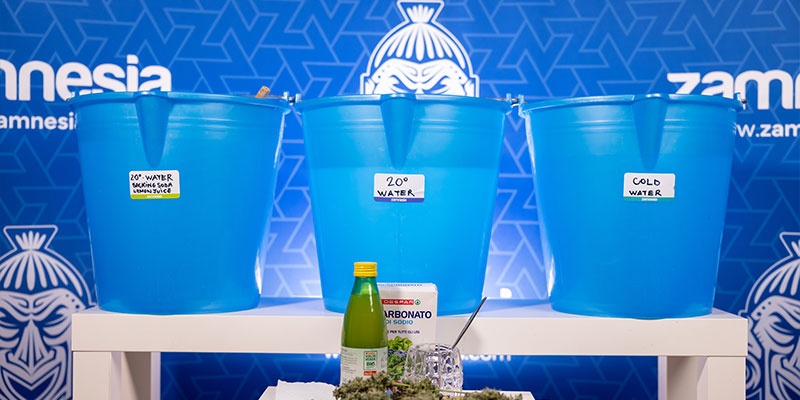
- Three large buckets capable of fully submerging your buds in water (standard 10-litre plastic buckets should do the trick)
- Baking soda (sodium bicarbonate)
- Lemon juice
- Lukewarm water
- Large spoon (for stirring)
Preparation
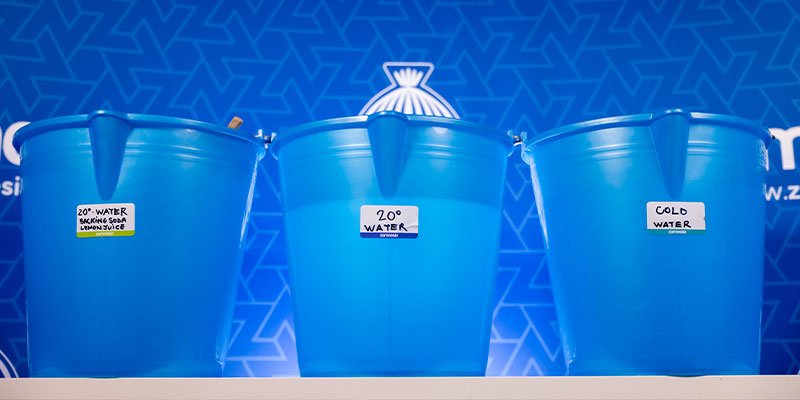
- Bucket 1:
Fill one of the three buckets with lukewarm water around 20°C. For every litre, add 2 teaspoons of baking soda and 2 teaspoons of lemon juice. So, if you're using a 10 l bucket, add 20 teaspoons of baking soda and the same amount of lemon juice. Using the spoon, stir for a bit to let everything dissolve.
The baking soda and lemon juice will produce a mild chemical reaction that breaks up stuff like dirt and other contaminants. Yet, it isn't strong enough to dislodge trichomes.
- Bucket 2:
Fill this bucket with some lukewarm water. Again, around 20°C will do just fine. We will use this bucket to rinse off the water from bucket 1.
- Bucket 3:
Fill bucket 3 with cold water only. This one will act as our second rinsing bucket.
And that's it! We now have a “washing bucket” (bucket 1) and two buckets for rinsing. We're using two rinsing steps because we want to ensure all debris is cleaned off.
Step-by-step instructions
Before getting started, line up your three buckets so you can easily access them. A clean area on a balcony, terrace, or somewhere in your home will be fine.
If you just harvested, you’ll likely have a container for your fresh buds. Keep another container handy to hold the washed buds temporarily. Alternatively, you can just cut branches from your plant and, after some trimming, wash them right away.
Important: You'll also need to prepare a spot where you can hang your washed buds to dry. Only start washing when everything is ready. You don’t want to end up with a bunch of soaking wet buds and not know how or where to dry them.
Step 1: Harvest your buds

Using pruning shears or a sharp knife, cut the bud-carrying branches off your cannabis plant. For washing and drying, it is more convenient to cut entire branches. Leave enough stem so you can handle the branches without touching the buds. Fewer but larger branches will also make washing and drying quicker and easier.
Step 2: Trim the buds

Trimming your buds before washing is recommended. This will eliminate the excess chlorophyll and the grassy taste it imparts, especially after being washed. Likewise, it will be more effective to wash already-trimmed buds. Of course, you can still dry-trim after washing and drying if that’s what you prefer. It’s up to you.
Step 3: Dip into bucket 1

Take a branch and fully submerge it in bucket 1. The lemon juice and baking soda will immediately start breaking down surface contaminants. After a few seconds, debris may come off your buds.
Holding the branch firmly by the stem, gently move it around in the water; swipe left and right, and swirl it around in a circle. The more you move the buds around, the more dirt and other contaminants will be removed. Just don’t be too rough. Keep washing for about 30 seconds.
Step 4: Shake off excess

Remove the branch from bucket 1 and gently shake it for several seconds. This will help eliminate any remaining water, dirt, and debris that may still be attached to the buds.
Step 5: Rinse in bucket 2

Now, do the same thing you did with the branch in bucket 1, but this time in bucket 2, rinse and remove whatever may be left from bucket 1. Move it around for about 30 seconds. Remove the branch from the bucket and shake off the water again like you did before.
Step 6: Final rinse in bucket 3

Now, dip the branch into your final rinsing bucket 3, the one with the cold water. Repeat what you did before, gently swirling the branch around to give it its final rinse.
At this point, it’s likely you'll already see some dirt and debris floating in buckets 1 and 2. Can you imagine smoking all that stuff? Well, not anymore, because you've now washed it all away!
After about 30 seconds, remove the branch from bucket 3 and give it a final gentle shake to remove excess water.
Step 7: Hang to dry

Freshly harvested buds are already quite prone to mould, but now, after washing, we have buds that are soaking wet. This means we need to hang them to dry right away!
The best place to dry your buds is in a location with a nice breeze. If you hang them indoors, you'll want some fans nearby to help with the drying process. Turn the fan(s) on high for about an hour to allow a significant portion of the water to evaporate quickly. Afterwards, turn the fan back to its normal speed. A light breeze blowing gently across the entire drying room is optimal.
Washing mouldy buds: Step-by-step instructions
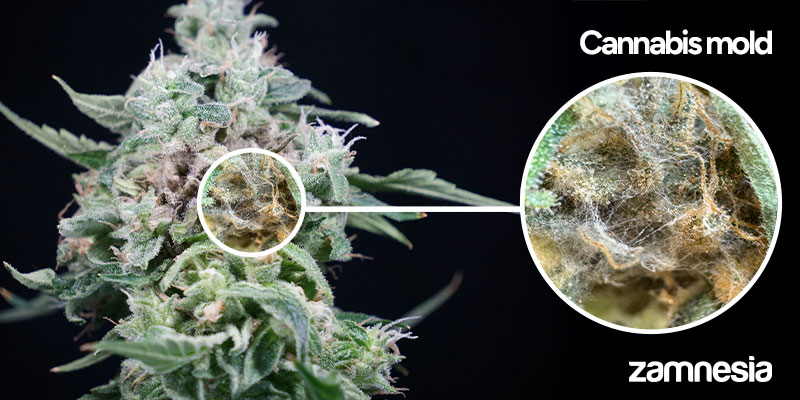
Discovering mould on your harvested buds can be disheartening, but all is not lost. If the mould is minimal and hasn't spread deeply into the flowers, you may be able to salvage your harvest using a targeted bud washing method.
One of the most trusted techniques comes from the cannabis community itself. Widely shared on platforms like Reddit, this approach combines bud washing with hydrogen peroxide and water to kill mould spores and wash away contaminants.
What you'll need
- 3 clean buckets or large containers
- Food-grade hydrogen peroxide (3%)
- Clean, room-temperature water
- Drying rack or clothes hangers
- Fans or a dehumidifier for the drying area
Step-by-step: mould washing method
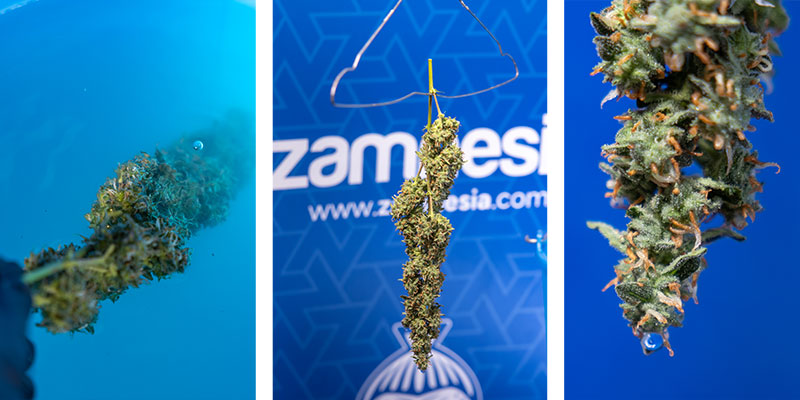
Step 1: Prepare the buckets
- Bucket 1: Mix 1 part 3% hydrogen peroxide with four parts water
- Bucket 2: Fill with plain, lukewarm water for rinsing
- Bucket 3: A second rinse bucket with clean water
Step 2: Dip and swirl gently
Submerge your freshly harvested buds in the peroxide mix. Gently swirl them for 30–45 seconds to dislodge spores, insects, and debris.
Step 3: Rinse thoroughly
Transfer the buds to the second and third buckets and gently rinse to remove any remaining solution.
Step 4: Dry immediately
Hang buds upside down or lay them on a mesh rack in a well-ventilated space with air movement and low humidity. Quick drying is essential to avoid any further mould development.
Step 5: Inspect carefully
Watch closely during drying. If any buds still show visible mould inside the flower after washing, discard them to prevent any cross-contamination.
Now you know how to bud wash using two separate methods. The first using lemon juice and baking soda should be your default, while peroxide is best suited to cases of light mould.
Consider water curing
Alternatively, if you're dealing with degraded or questionable buds, you might consider water curing cannabis as a post-harvest method. This technique can improve smoothness and strip out any undesirable compounds, though it does come at the cost of some flavour and aroma.
Best practices for post-wash drying
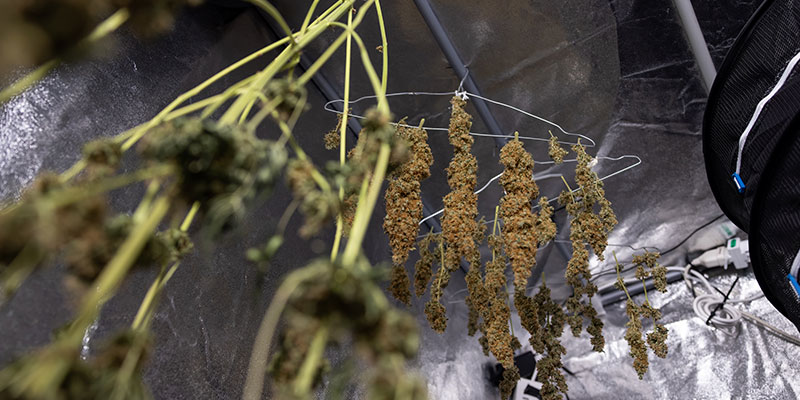
As mentioned, proper drying becomes even more critical after washing your buds. Since extra moisture has been introduced, failing to dry thoroughly can undo all of the benefits of washing, leading to mould, mildew, or a compromised cure. Below are the key practices to ensure your buds dry cleanly and safely.
Set up a controlled drying environment
- Temperature: Aim for a room temperature of around 18–21°C. Too much heat can degrade terpenes, while cool, damp conditions will encourage mould growth.
- Humidity: Keep relative humidity around 50%. If needed, you can always use a hygrometer and a dehumidifier to control this further.
- Air circulation: Use fans to keep air moving around (not directly on) the buds. Stagnant air will also increase the risk of mould.
- Lighting: Dry your buds in a dark space, as light can degrade cannabinoids and terpenes over time.
How to hang or lay buds to dry
- Hanging: Hang entire branches upside down from strings, racks, or hangers. This method allows good airflow around each cola.
- Flat drying: If your buds are trimmed and small, place them on mesh drying racks lined with parchment paper for better air exposure.
How long does it take?
- Typical timeframe: Washed buds usually take 7–10 days to completely dry, depending on density, airflow and humidity.
- Check for readiness: When the bud is dry, the stems should snap cleanly (not bend). The buds should feel crisp on the outside but not crumbly.
Drying tips to prevent mould
- Don't overcrowd your drying space: Give each bud breathing room.
- Rotate or reposition buds if drying flat, to avoid moist spots.
- Inspect daily for signs of mould, especially in dense flowers or colder areas.
For a deep dive into ideal drying and curing techniques after washing, check out our guide on how to properly dry and cure cannabis buds.
Common mistakes to avoid
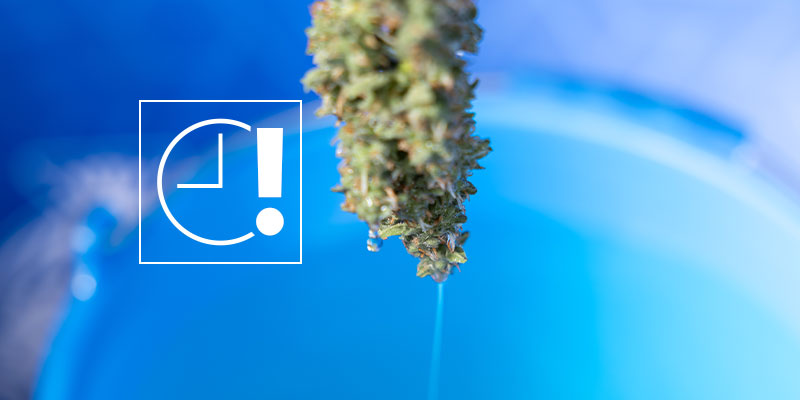
Bud washing is a simple process, but a few missteps can impact the final quality of your harvest. Avoid these common pitfalls to ensure your buds stay clean, potent, and, most importantly, mould-free.
Over-soaking the buds
Leaving buds in the wash solution for too long can cause waterlogging, increasing the risk of mould and nutrient leaching. Gently swirling each bud in the solution for 30–60 seconds is usually sufficient. Extended soaking really offers no extra benefit and can often do more harm than good.
Not drying properly
This is arguably the most critical step after bud washing. If your buds aren't dried thoroughly and evenly, trapped moisture can lead to mildew or Botrytis. Ensure your drying environment is well-ventilated, and closely monitor temperature and humidity.
Using dirty equipment
Buckets, scissors, and even your hands should be sterile or thoroughly cleaned before and after the wash. Cross-contamination is a serious risk, especially when dealing with pests or mould. After trimming, it's also essential to clean cannabis trimming scissors to prevent gunk buildup and the transfer of plant pathogens.
Not flushing before harvest
Bud washing helps remove surface residues, but it doesn't eliminate chemical buildup inside the plant. Flushing your cannabis plants with pure water during the final 1–2 weeks before harvest helps remove any excess nutrients and improves the taste and smoothness of your final product. Learn more about flushing cannabis plants for optimal results.
Washing cannabis buds: Yay or nay?
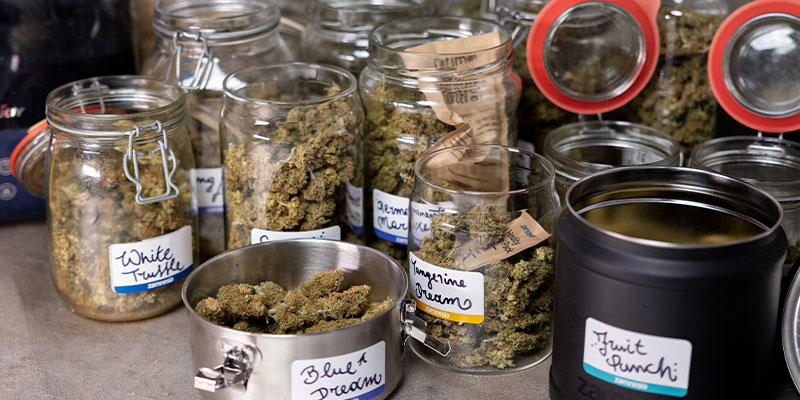
If you've made it this far, you're probably wondering whether bud washing is really worth the effort. For most growers, especially those dealing with outdoor environments, pests, or dusty conditions, the answer is a resounding yes!
Bud washing is a simple, science-backed method to:
- Improve the cleanliness of your harvest
- Enhance the flavour and smoothness of your smoke or vapour
- Reduce the risk of mould, unwanted residues, and contaminants
- Give peace of mind that your cannabis is safe and pure
When combined with the proper drying and curing techniques, bud washing really has the potential to elevate your final product without compromising on aroma, flavour, or potency. The learning curve is low, the results are impressive, and the benefits speak for themselves.
So, why not give it a go on your next harvest?
If you're planning a future home growing project, check out our selection of cannabis seeds to get started with the highest-quality genetics.
And once your buds are cleaned and dried, make sure you know how to store your cannabis and keep it fresh for long-lasting quality.


 United States


